This is the eighth blog post in this series. You can find the previous posts here:
- Innovations in Integration on the Microsoft Platform
- Lowering Barriers to Innovation: BizTalk IaaS and Walkthrough
- BizTalk Sever 2013 Enhancements
- Windows Azure BizTalk Services EDI Overview Including Portal Configuration
- Windows Azure BizTalk Services – Utilizing EAI Bridge
- Windows Azure BizTalk Services: Integrating with on-premises LOB systems usingthe BizTalk Adapter Services
- ReST (Representational State Transfer) in BizTalk 2013
Companies that leverage Dynamics CRM Online want to take full advantage of its rich set of capabilities by integrating with existing lines of business systems that are available on premise. It is common nowadays for organizations to have other lines of business systems that are hosted on premise, behind the firewall.
In this initial blog, I will show one solution that is available for integrating CRM Online with BizTalk 2013 hosted on premise. In the first scenario, I will demonstrate how data can be sent from the BizTalk application to CRM Online.
BizTalk to CRM Online Integration
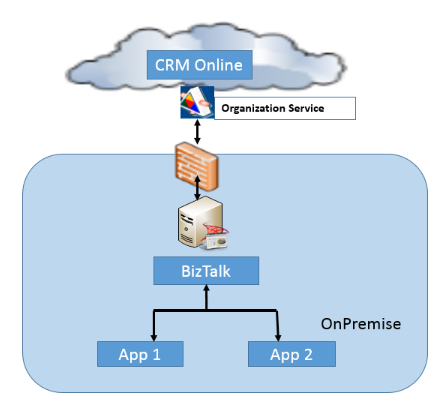
Fig. 1: Overall Architecture of main components
CRM Online exposes the Organization Service (IOrganizationService). This is a built-in CRM WCF service that is used to interact with CRM data and metadata.
I will be simulating creating a new account via BizTalk and show how to send it to CRM Online. In order to run this scenario, you will need the following:
- CRM Online account
- CRM SDK
- BizTalk Server 2013
Summary of steps (additional details and screenshots below):
- Navigate to the CRM online organization instance to retrieve the OrganziationService URL.
- Use BizTalk WCF Service Consuming wizard to generate schema from the Organization Service web service.
- Create source schema (Account schema).
- Map source schema to the CRM online schema generated in step 2.
- Create orchestration (CreateAccount orchestration).
- Create custom binding and behavior; register them in BizTalk.
- Configure WCF custom send port.
- Configure BizTalk.
- Simulate sending message by dropping the account sample file in the predefined folder.
- Log into CRM Online and verify that the account has been created.
Using Organization Service to interact with CRM Online Walkthrough:
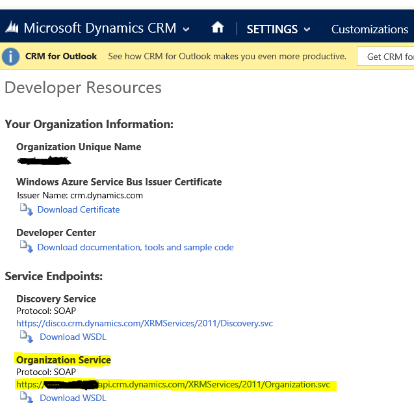
Step 1 – Log into CRM Online to retrieve Organization Service URL;
Go to Settings – > Customizations -> Developer Resources
Step 2 – Use BizTalk Publish Wizard to generate the schema and the binding file.
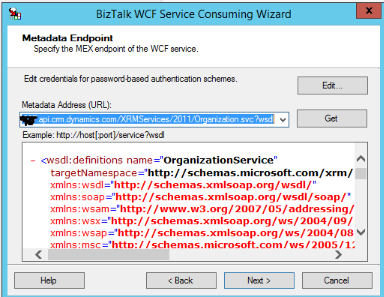
In BizTalk solution right-click schema project, select Add and then Add Generated Items; selectConsume WCF Service Wizard; navigate through the wizard and enter the URL of your Dynamics Organization Service endpoint ( the url discovered in Step1); after clicking the Get button, click ‘Next’ and select Import.
Step 3 – Replace the generated Organization Service schema with the BizTalk schemas that are provided via CRM SDK (\SDK\Schemas\CRMBizTalkIntegration)
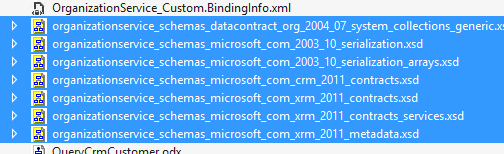
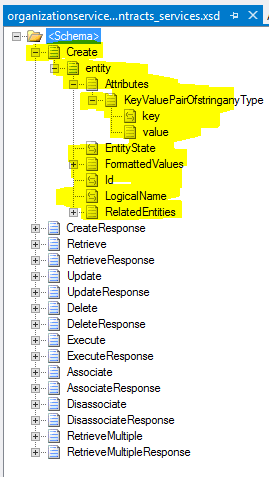
Below is the organizationservice_schemas_microsoft_com_xrm_2011_contracts_services schema. Note that the schema provides CRUD operations in addition to the other CRM-related operations. The nodes that are being used to create a new account are highlighted below. The schema provided by CRM is flexible; it exposes a key-value pair; the key maps to the CRM entity attribute (i.e. name, address1, city, or phone). LogicalName maps to the CRM entity name (i.e. account).
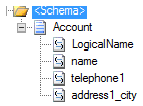
Step 4 – Create account schema.
Step 5 – Map account schema to the expected CRM schema format.
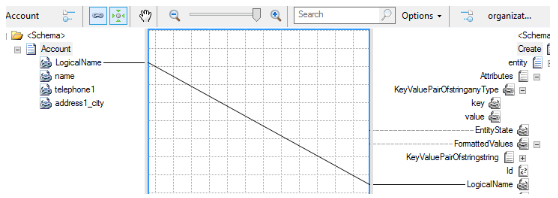
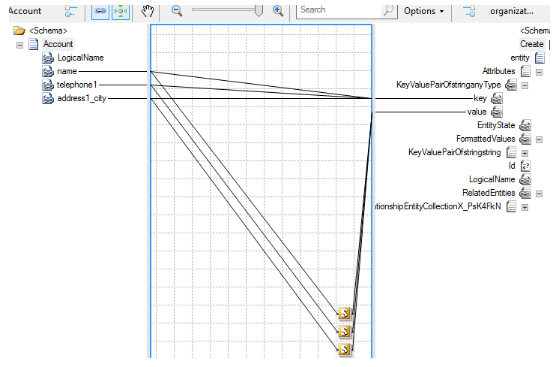
Step 6 – Create orchestration in BizTalk. The orchestration is receiving the message viarcvAccountPort; it then uses Construct Message shape to map the message received to the expected Organization Service schema and sends it to CRM. The response message is captured and written to the file system.

Step 7 – Deploy BizTalk artifacts to BizTalk.
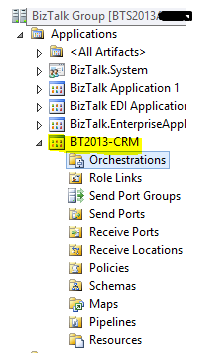
Step 8 – Configure OrganizationService send port.
Import the binding configuration (OrganizationService_Custom.BindingInfo) generated in Step-2. Rename the port from auto generatedWcfSendPort_OrganizationService_CustomBinding_IOrganizationService_Custom toOrganizationService.
CRM Online is using Windows Live Id authentication. In order to configure the BizTalk send port to authenticate with CRM Online instance, a custom WCF behavior has to be built and registered in the Global Assembly Cache (GAC) and the configuration file (machine.config or in BizTalk WCF-Custom send handler).
Mikael Håkansson’s blog post provides a detailed explanation with the sample code for creating the custom WCF behavior. I leveraged it for this demo. See below the detailed steps necessary to configure the OrganizationService send port.
OrganizationService send port.
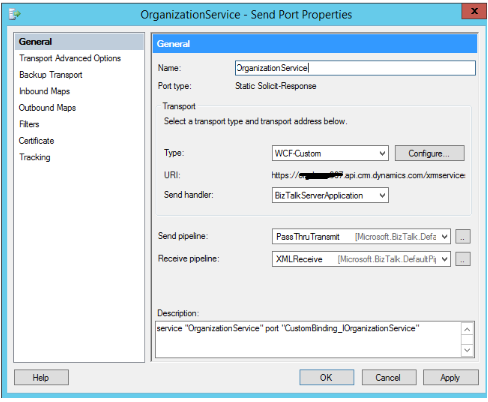
OrganizationService Send Port – General tab view.
Note that no changes have been made to the custom binding generated in Step 2.
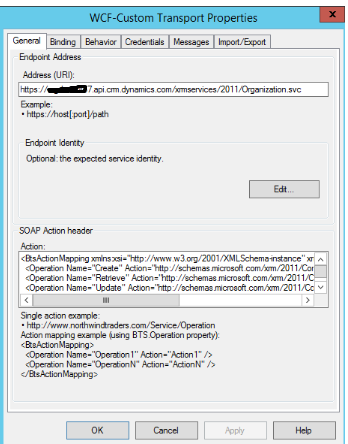
OrganizationService Send Port – Binding tab view.
Select customBinding as the Binding Type.
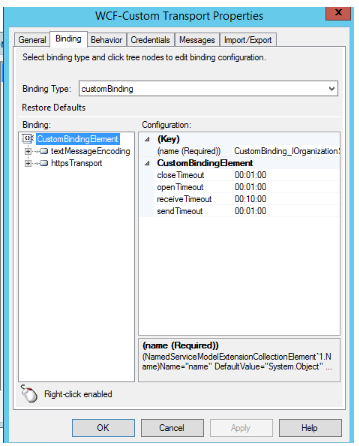
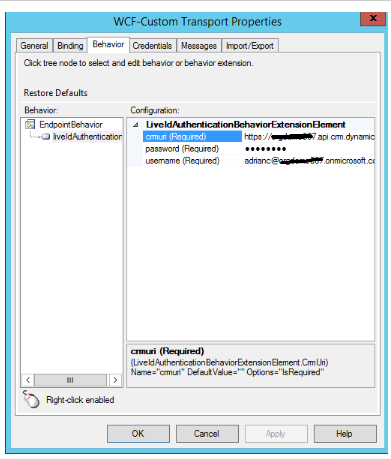
OganizationService Send Port – Behavior tab view
I am using liveIdAuthentication custom behavior which requires the following three properties:
- crmuri – the organization service url (https://yourorgname.api.crmapi.crm.dynamics.com/XRMServices/2011/Organization.svc)
- username – CRM username
- password – CRM password
Step 9 – Start BizTalk application.
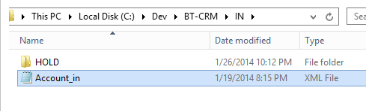
Drop the sample file that contains account-related information in the predefined incoming folder.
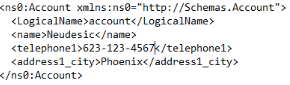
Sample file:
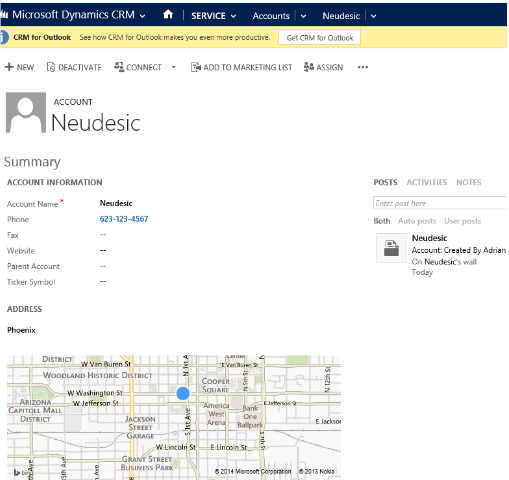
Verify in CRM Online that the account has been added.
Verify the response is received in the expected file system folder.
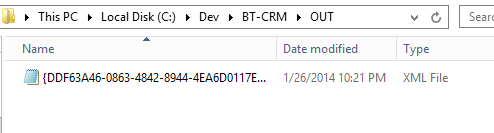
The response contains the account id which was automatically generated when the new account entity was created in CRM.
Response Message:

The scenario that was presented above used the WCF SOAP Organization Service to integrate with the CRM Online application. Another option typically used for interacting with CRM Online is for BizTalk to leverage a proxy service which in turn uses CRM SDK API to authenticate and communicate with CRM; crmsvcutil tool is part of CRM SDK and can be leveraged to create early bound entity CRM classes that can be used in the proxy service. The proxy service approach is recommended for more complex integration scenarios.
Useful Resources:
- CRM Developer Center
- CRM Online 30 day trial subscription
- Creating WCF Custom Behavior to Connect to CRM Online by Mikael Håkansson
- CRM Online 2011 WebService – SOAP Only Client by Girish Raja
- Use the IOrganizationService Web Service to Read and Write Data and Metadata
- Integrating BizTalk Server and Microsoft Dynamics CRM by Richard Seroter
- CRM 2011 Integration How to Video #1: BizTalk On-Premise to CRM 2011 by Peter Kelcey


No comments:
Post a Comment