Please follow the below steps to configure Subscribe to email:
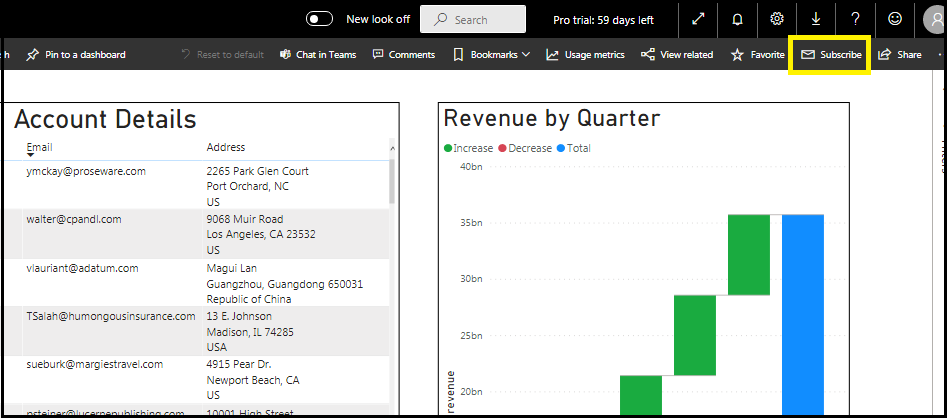
Step 1: To configure ‘Subscribe to email’, we need to click on the “Subscribe” button, please refer to the below screenshot:
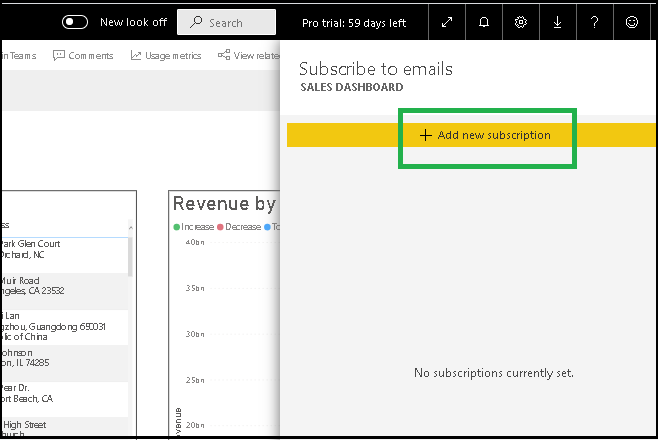
Step 2: On click of the ‘Subscribe’ button a new form will open, click on the “+ Add New Subscription” and the configuration setting will open, as you can see in the below screenshots:
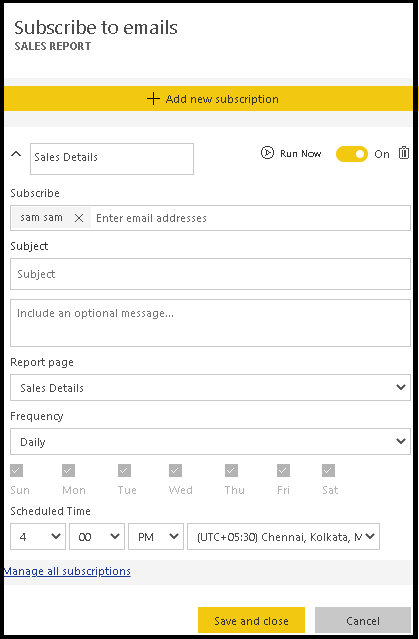
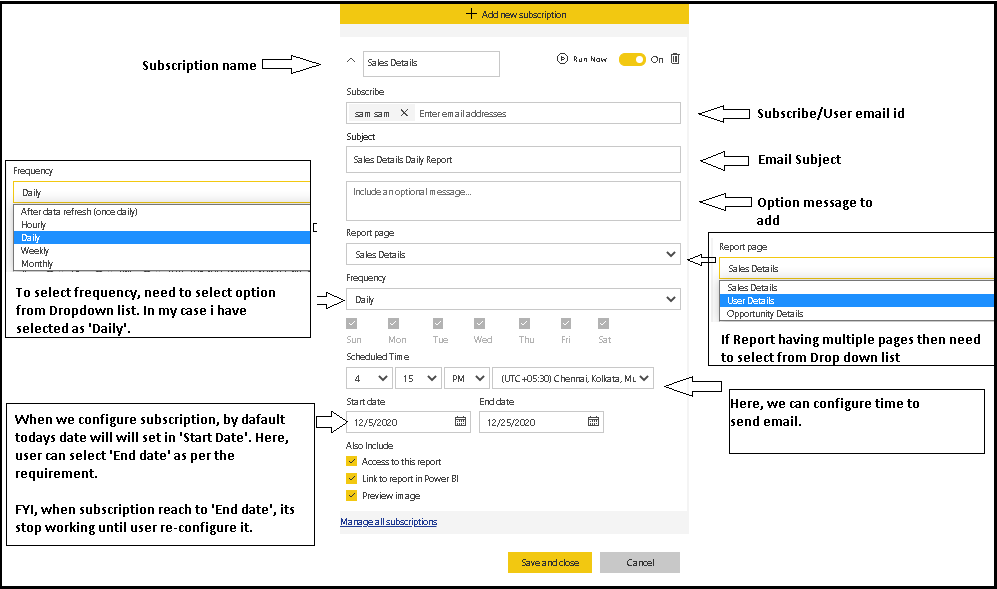
Step 3: For the next step, we need to configure details like Subscription name, email subject, an optional message, Frequency (i.e. Send email on Hourly/Daily/ Weekly/Monthly/ after data refresh basis), schedule Time (i.e. Time to send email) and other details.
Step 4: Click on the ‘Save and Close’ button and it will start working for you.
Note:
- This feature is suitable if you have charts in Reports or have a limited number of records that fit in a table. If you have a large number of records in a table and to view all records you need to use the scrollbar/Pagination then “Subscribe” will not work properly. Since it takes a screenshot of the current visual, it leaves remaining records. FYI, in the email, it will have a “Go to Report” button, so the user can open an embedded report and view all details here.
a) If the Report having multiple pages and you want to send all pages then need to create a new subscription for each page. And for each page user will receive a separate email.
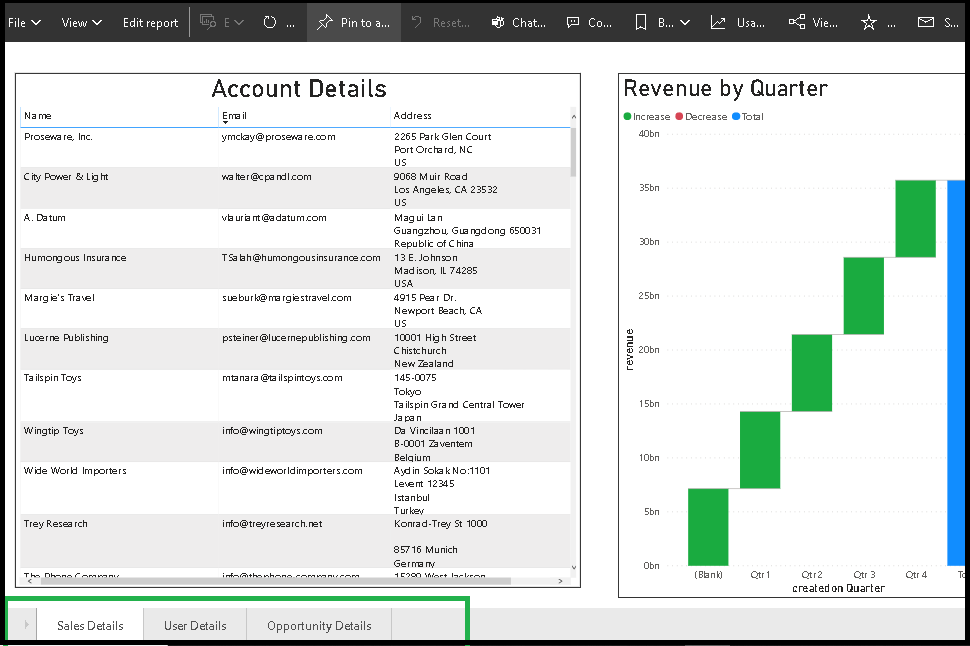
Send Power BI Dashboard details through Email:
Using the “Pin a Dashboard” button we can add report all pages to the Dashboard. And using the “Subscribe” button we can configure ‘Send to email’ for Dashboard.
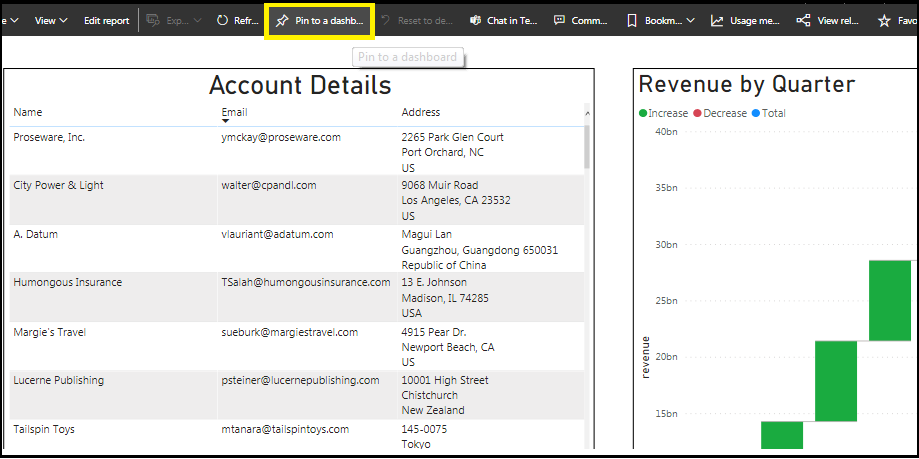
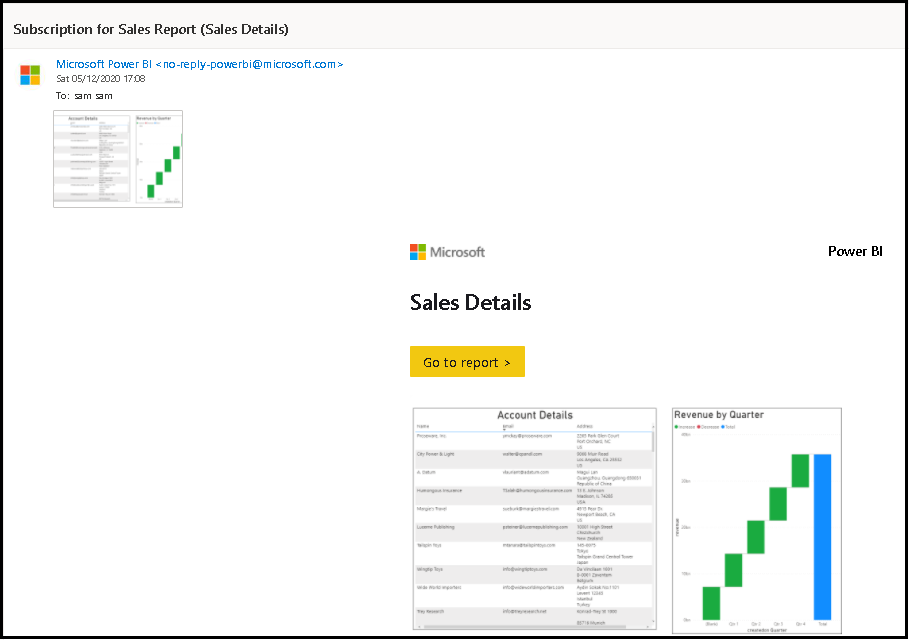
Here, the user will receive a single email that will have a screenshot of Dashboard (i.e. Show all pages in a single screenshot that are added on Dashboard).
Below is the screenshot received Email:
b) On-Off, delete or Manually run Subscription:
- On-Off Subscription: Using the Yellow on/off toggle button we can enable or Disable subscription. If you don’t want to trigger Subscription then need to set ‘off’ here.
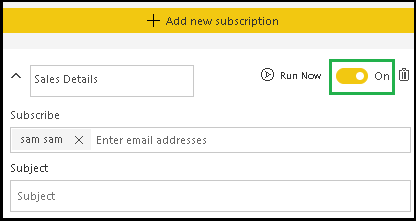
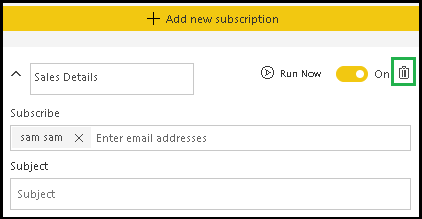
- Delete Subscription: By clicking the delete button icon, we can delete the subscription.
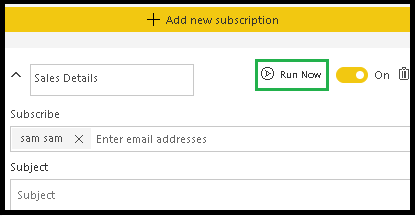
- Run Now: We can test Subscription by clicking the “Run Now” button, it will send an email right away.
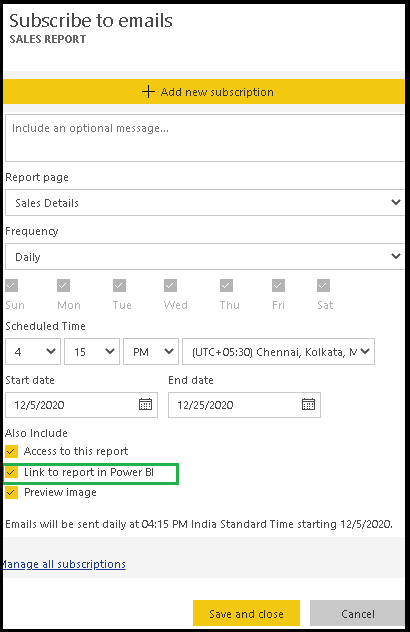
- Remove ‘Go to Report’ button: If you don’t want the ‘Go to Report’ button in the email then un-check the “Link to report in Power BI” property. By default this property is checked/enabled, as shown in the below screenshot:


No comments:
Post a Comment