Add an HTTP + Swagger trigger
This built-in trigger sends an HTTP request to a URL for a Swagger file that describes a REST API. The trigger then returns a response that contains that file's content.
Sign in to the Azure portal. Open your blank logic app workflow in the designer.
On the designer, in the search box, enter swagger. From the Triggers list, select the HTTP + Swagger trigger.

In the SWAGGER ENDPOINT URL box, enter the URL for the Swagger file that you want, and select Next.
Make sure to use or create your own endpoint. As an example only, these steps use the following Cognitive Services Face API Swagger URL located in the West US region and might not work in your specific trigger:
https://westus.dev.cognitive.microsoft.com/docs/services/563879b61984550e40cbbe8d/export?DocumentFormat=Swagger&ApiName=Face%20API%20-%20V1.0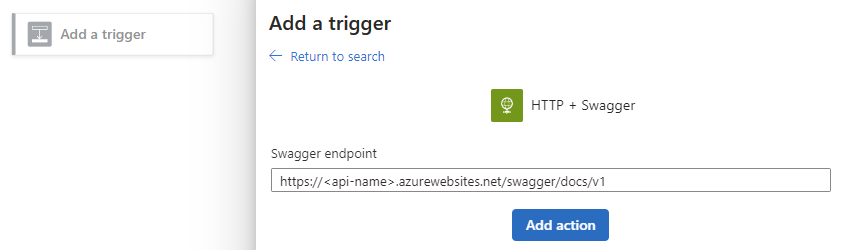
When the designer shows the operations described by the Swagger file, select the operation that you want to use.

Provide the values for the trigger parameters, which vary based on the selected operation, that you want to include in the endpoint call. Set up the recurrence for how often you want the trigger to call the endpoint.
This example renames the trigger to "HTTP + Swagger trigger: Face - Detect" so that the step has a more descriptive name.

To add other available parameters, open the Add new parameter list, and select the parameters that you want.
For more information about authentication types available for HTTP + Swagger, review Add authentication to outbound calls.
Continue building your workflow with actions that run when the trigger fires.
When you're finished, remember to save your workflow. On the designer toolbar, select Save.
Add an HTTP + Swagger action
This built-in action sends an HTTP request to the URL for the Swagger file that describes a REST API. The action then returns a response that contains that file's content.
Sign in to the Azure portal. Open your logic app workflow in designer.
Under the step where you want to add the HTTP + Swagger action, select New step.
To add an action between steps, move your pointer over the arrow between steps. Select the plus sign (+) that appears, and then select Add an action.
On the designer, in the search box, enter swagger. From the Actions list, select the HTTP + Swagger action.

In the SWAGGER ENDPOINT URL box, enter the URL for the Swagger file that you want, and select Next.
Make sure to use or create your own endpoint. As an example only, these steps use the following Cognitive Services Face API Swagger URL located in the West US region and might not work in your specific action:
https://westus.dev.cognitive.microsoft.com/docs/services/563879b61984550e40cbbe8d/export?DocumentFormat=Swagger&ApiName=Face%20API%20-%20V1.0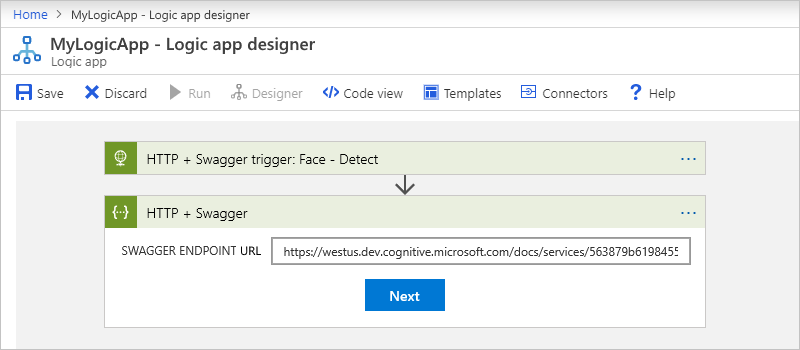
When the designer shows the operations described by the Swagger file, select the operation that you want to use.

Provide the values for the action parameters, which vary based on the selected operation, that you want to include in the endpoint call.
This example has no parameters, but renames the action to "HTTP + Swagger action: Face - Identify" so that the step has a more descriptive name.
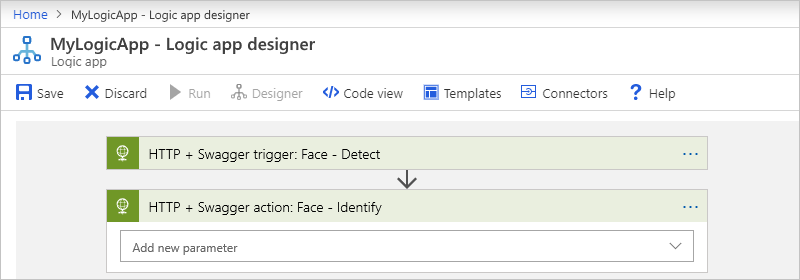
To add other available parameters, open the Add new parameter list, and select the parameters that you want.
For more information about authentication types available for HTTP + Swagger, review Add authentication to outbound calls.
When you're finished, remember to save your logic app workflow. On the designer toolbar, select Save.
Host Swagger in Azure Storage
You can still reference a Swagger file that's not hosted or that doesn't meet the security and cross-origin requirements. Upload the Swagger file to blob container in an Azure storage account and enable CORS on that storage account. To create, set up, and store Swagger files in Azure Storage, follow these steps:
Now enable CORS for the blob. On your storage account's menu, select CORS. On the Blob service tab, specify these values, and then select Save.
Property Value Allowed origins *Allowed methods GET,HEAD,PUTAllowed headers *Exposed headers *Max age (in seconds) 200Although this example uses the Azure portal, you can use a tool such as Azure Storage Explorer, or automatically configure this setting by using this sample PowerShell script.
Create a blob container. On the container's Overview pane, select Change access level. From the Public access level list, select Blob (anonymous read access for blobs only), and select OK.
Upload the Swagger file to the blob container, either through the Azure portal or Azure Storage Explorer.
To reference the file in the blob container, get the HTTPS URL that follows this format, which is case-sensitive, from Azure Storage Explorer:
https://<storage-account-name>.blob.core.windows.net/<blob-container-name>/<complete-swagger-file-name>?<query-parameters>
Connector reference
This section provides more information about the outputs from an HTTP + Swagger trigger or action. The HTTP + Swagger call returns this information:
| Property name | Type | Description |
|---|---|---|
| headers | Object | The headers from the request |
| body | Object | The object with the body content from the request |
| status code | Integer | The status code from the request |
| Status code | Description |
|---|---|
| 200 | OK |
| 202 | Accepted |
| 400 | Bad request |
| 401 | Unauthorized |
| 403 | Forbidden |
| 404 | Not Found |
| 500 | Internal server error. Unknown error occurred. |


No comments:
Post a Comment