Power Automate REST API connector
In Power Automate there is a connector ‘HTTP’ that is used to invoke the REST API to the workflow and get the responses as needed, but this action is only for a premium connection.
There is another action ‘Send an HTTP request to SharePoint‘ that construct a SharePoint REST API to invoke. This SharePoint REST API allows operations to work with SharePoint list, list items, sites, folders, and files.
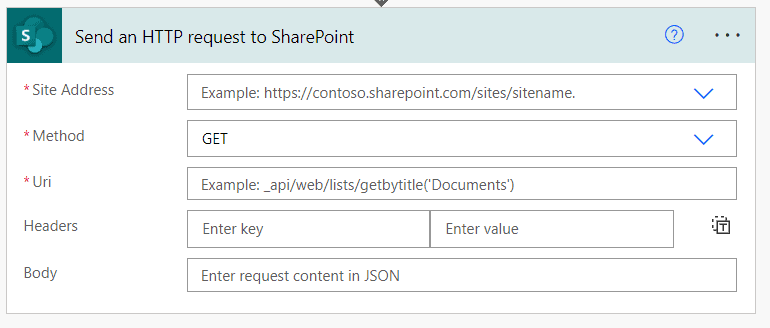
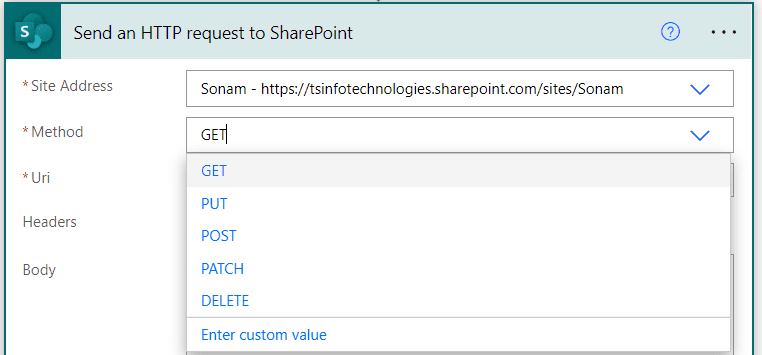
To perform the operations, we need to insert the method from the drop-down list. The available methods are:
- GET– This HTTP GET method is used to read or retrieve the information from the SharePoint server.
- POST– To create or write a new item in the SharePoint list, we need to use the REST API POST method.
- PATCH– This method is used to update an item in the SharePoint online list.
- DELETE– This HTTP method is used to delete a SharePoint object like a SharePoint list, document library, and an item.
- PUT– This method is used to remove the old item from the SharePoint list and update the existing object (i.e. an item in the SharePoint list).
Next, we have to provide the Uri by invoking an API. The Uri stands for Uniform Resource Identifier which identifies one resource from another.
Microsoft provides a document where users can get more ideas about how to set uri or rest API endpoints for different operations. For example,
http://<site collection>/<site>/_api/web/listsRead Power Automate Trigger Conditions
Power Automate REST API SharePoint list
In this example, we will see how to create a dynamic SharePoint list from a template using the REST API.
To create the SharePoint list, the following steps are:
- Let’s create an Instant cloud flow that triggers the flow manually. On Power Automate, click on create > Instant Cloud Flow > Manually trigger a flow > Create.

- Add an action ‘Send an HTTP request to SharePoint‘ under the trigger and provide the SharePoint site address where to create the SharePoint list. Also, set the properties such as:
- Method – Post
- Uri – _api/web/Lists/
- Headers –
- accept – application/json;odata=verbose
- content-type – application/json;odata=verbose
- Body–
{ '__metadata': { 'type': 'SP.List' }, 'AllowContentTypes': true,
 'BaseTemplate': 100, 'ContentTypesEnabled': true, 'Description': 'My list description', 'Title': 'MonthlySalesReport' }
Note- We have provided the name ‘MonthlySalesReport’ for the newly created SharePoint list.

Now save the flow, then test it manually. We can see it will create a SharePoint list on the provided SharePoint site.

This is how to create a SharePoint list on the SharePoint site using Power Automate REST API.
Read Power Automate IF Expression
How to create a SharePoint list item using Power Automate REST API
Similarly, we will see how to create an item in the SharePoint list using Power Automate REST API. Here we are going to use the previous SharePoint list i.e. MonthlySalesReport and add some random columns such as Products(Single line text) and Quantity(Number).
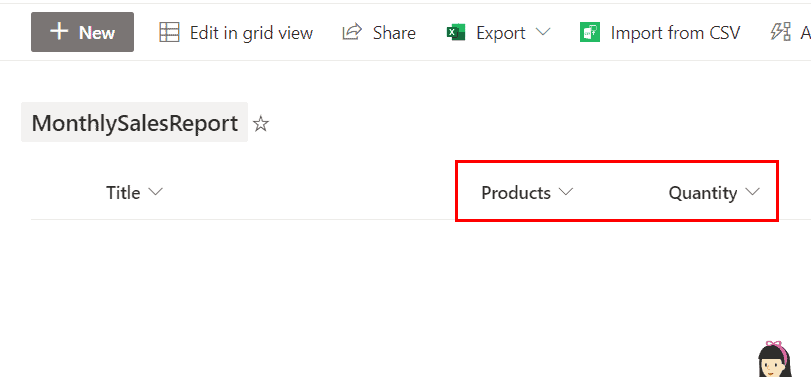
To insert the data in the SharePoint list, we will create a flow using Power Automate REST API. The following steps are:
- On Power Automate, create an instant cloud flow that will trigger the flow manually.
- Then add a ‘Send an HTTP request to SharePoint‘ action and provide the site address of the SharePoint. Also, set the properties such as:
- Method – POST
- Uri – _api/web/Lists/GetByTitle(‘MonthlySalesReport’)/Items
- Headers –
- accept – application/json;odata=verbose
- content-type – application/json;odata=verbose
- Body– (Insert the below REST API code)
{
  "__metadata": {
    "type": "SP.Data.MonthlySalesReportListItem"
  },
  "Title": "March",
  "Products": "Pro-1",
  "Quantity": "15"
}
Now, click on save and test the flow manually. We can see it will create an item in the SharePoint list.

This is how to create an item in the SharePoint list using Power Automate REST API.
Read Power Automate Multiple Conditions
Power Automate REST API gets SharePoint list items
Here, we will see how to get the item from the SharePoint list using Power Automate REST API. Let’s take the previous SharePoint list to implement this.
To read the items from the SharePoint list, we are going to create a flow. The following steps are:
- On Power Automate, create an instant cloud flow that triggers the flow manually.
- Under the trigger, add an action ‘Send an HTTP request to SharePoint‘ and provide the SharePoint site address. Set the below properties such:
- Method- GET
- Uri- _api/web/Lists/getByTitle(‘MonthlySalesReport’)/items

Now, click on save and test it manually. We can see it will retrieve the items that store in the SharePoint list. (As there is 1 item, it will so only that item).
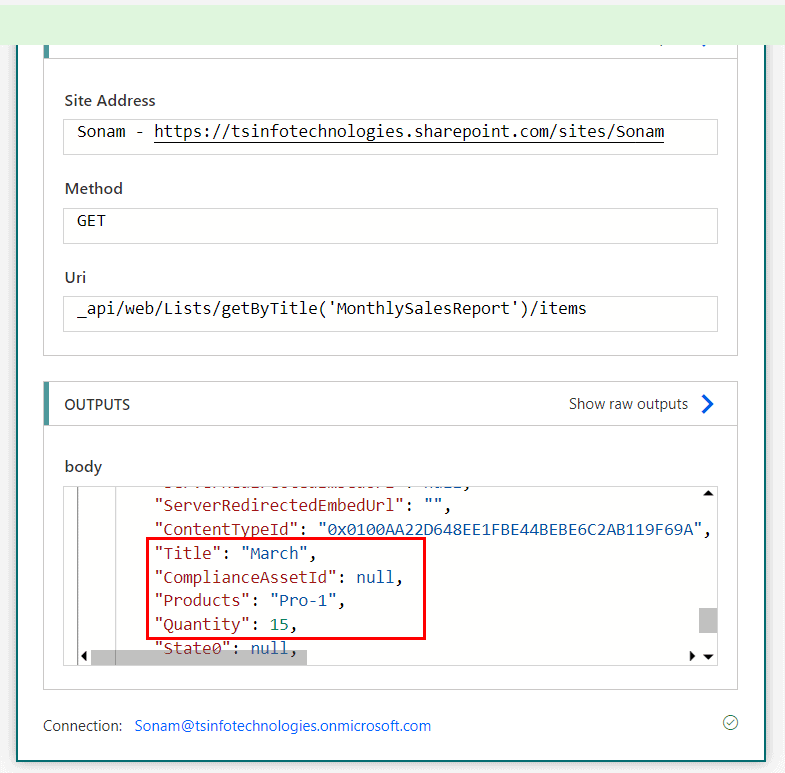
This is how to retrieve the SharePoint item using Power Automate REST API GET method.
Read Power Automate Parallel Branch with Examples
Power Automate REST API creates a column
In this example, we will see how to create a custom column in a specified Sharepoint list using Power Automate REST API.
To implement this, we are going to use the SharePoint list that will created previously i.e. MonthlySalesReport.
Now, we will create a flow that will create a custom column in the existing SharePoint list. The following steps are:
- On Power Automate, create an instant cloud flow that triggers the flow manually.
- Under the trigger, add an action ‘Send an HTTP request to SharePoint‘. Provide the SharePoint site address and give the below details on the properties.
- Method – POST
- Uri – _api/web/Lists/getByTitle(‘MonthlySalesReport’)/fields
- Headers –
- accept – application/json;odata=verbose
- content-type – application/json;odata=verbose
- Body –
{ '__metadata': { 'type': 'SP.Field' },
     'FieldTypeKind': 2,
     'Title':'State'
}
Note – Here the field name is State and the FieldTypeKind as 2 refers to the type of the field i.e. text. You can get more ideas about it from the FieldType Enumeration provided by Microsoft.
Similarly, we will create another column (currency type) i.e. Price in the existing SharePoint list. For this, add another ‘Send an HTTP request to SharePoint‘ action, and in the body, add the below REST API code.
{ '__metadata': { 'type': 'SP.Field' },
     'FieldTypeKind': 10,
     'Title':'Price'
}
Note- As the column is a currency type, the ‘FieldTypeKind‘ is 10.

Now save the flow and test it manually. We can see it will create the columns in the specified SharePoint list.
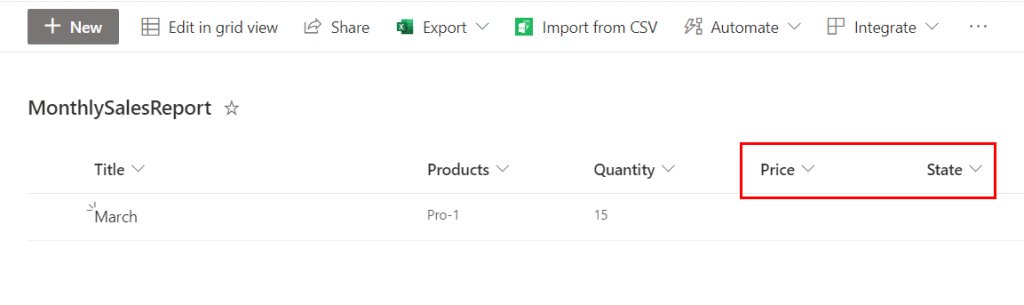
This is how to create columns in the SharePoint list using Power Automate REST API.
Read Power Automate email body formatting
Power Automate REST API SharePoint update list item
Now we will see how to update an existing list in the specified SharePoint list using Power Automate REST API. For example, we will update the title from March to February in the previous SharePoint list(i.e. MonthlySalesReport).
To create the flow, the following steps are:
- On Power Automate, create an instant cloud flow the trigger the flow manually.
- Under the trigger, add the action ‘Send an HTTP request to SharePoint‘ and provide the SharePoint site address.
- Method – PATCH
- Uri – _api/web/Lists/getByTitle(‘MonthlySalesReport’)/items(2)
- Headers –
- content-type – application/json;odata=verbose
- IF-MATCH – *
- Body –
{ '__metadata': { 'type': 'SP.Data.MonthlySalesReportListItem' },
     'Title':'February'
}
Note- In the Uri, we used 2 as the item ID that we want to update.

Now save the flow and test it manually. We can see the item will update to February from March.

This is how to update a list item in the SharePoint list using Power Automate REST API.
Power Automate REST API delete a SharePoint list item
Similarly, here we will see how to delete an existing item from the SharePoint list using REST API. Let us take the previous SharePoint list to implement this.
Follow the below steps to create the flow.
- On Power Automate, create an instant cloud flow that trigger the flow manually.
- Add an action ‘Send an HTTP request to SharePoint‘ and provide the SharePoint site address.
- Method- DELETE
- Uri- _api/web/Lists/getByTitle(‘MonthlySalesReport’)/items(2)
- Headers-
- content-type – application/json;odata=verbose
- IF-MATCH – *
- X-HTTP-Method – DELETE

Now, save the flow and test it manually. We can see it will delete the item whose ID is 2. (As there is only 1 item, so the list will appear as blank).

This is how to delete a specific item from the SharePoint list using Power Automate REST API


No comments:
Post a Comment